
Introduction
Beginning the process of sharing some of the techniques and code I use to develop Windows native applications, I decided to use an existing, but clean, Windows 10 virtual machine hosted by VMware ESXi 6. However, when it came to installing Visual Studio 2019 Community Edition, the installer claimed that there was insufficient disk space to proceed.
"No problem", I thought. I'll just shut the VM down and increase the size of the existing virtual
hard disk. However, after powering up the VM and checking with the Disk Management tool, I was
faced with this situation...
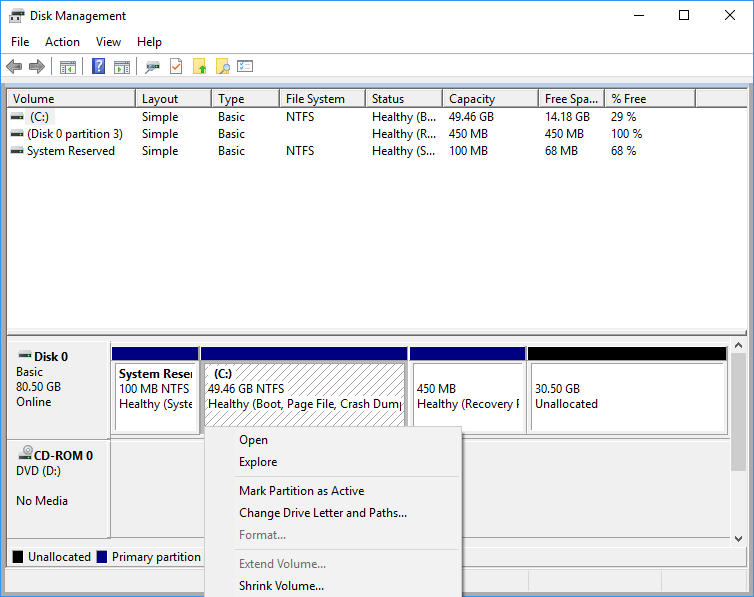
Of course, I could have just formatted the unallocated space and set it as a second drive, but I wanted to install Visual Studio to the C: drive. The issue here is that there is a recovery partition between the C: volume and the unallocated space. This greys out the "Extend Volume" option for C: because the partition to its right has allocated space.
Frustratingly, the Disk Management tool offers no way to move a partition. Most solutions I
discovered involved installation of
So for those of you facing a similar situation, this blog provides a solution, but as a disclaimer, Sonajen provides this for information purposes only and will not be held responsible for anything that may go wrong as a result of following these instructions. With a virtual machine, the best way to complete this process is to first take a snapshot, so that you always have a working system to return to in case of failure.